

For the mother’s dress, I first made a test of the bodice and sleeves in some spare fabric similar in weight and weave to the final fabric. Even though Kitty’s corset hadn’t arrived yet, we were able to test the bodice fit by having her try it on with a similar corset and her chemise on. I was able to tell that the fit through shoulders and neck worked well. I’ll make the final bodice able to have fine tuning adjustments made to the waist when we have her corset.
Kitty first tried on a test sleeve without it being attached to the bodice so I could see what fitting or style adjustment I might need to make. The armscye was too tight at the front, so I made it larger before attaching test sleeves. Then I had Kitty try on the bodice again with the sleeves attached. I was concerned about the folds radiating downward from the shoulder area, but we studied the dresses in period photos and found that they pretty much all have folds or bunchy fabric there due to the dropped armscye style that was in fashion.
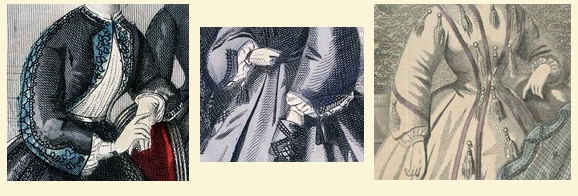
details of undersleeves from Godey’s Ladies book
The sleeve length is just right for a dress with undersleeves which were popular in 1863. White undersleeves were easier to wash and helped to keep their dresses clean. The dress sleeves will need to be made longer if Kitty decides she prefers a coat style sleeve instead.

Next I began working on the skirt. 4-40″ panels were seamed together leaving the left side seam open to allow the skirt to be laid out flat while making the pleats. Then I marked and sewed the left front placket opening. Next time I think it would be easier to do this before sewing any of the skirt panels together.
I made the pleats with the skirt laid out flat on a large table covered with a cutting board. After first testing to make sure it was removable on this fabric, I used a Dixon water soluble fabric marking pencil to mark the pleats, and finger pressed the pleats rather than using an iron. Ironing before the marks have been completely removed is not recommended.

For the cartridge pleats at the back waistline, I used strong nylon upholstery thread to gather them along my markings. Next time I’ll try using Tiger Tape as a stitching guide rather than marking every cartridge pleat. Jennifer Rosbrugh has some very helpful tips for cartridge pleats on her blog historical sewing. I’d like to try adding gross grain ribbon or inserting muslin in the top of the skirt to give more body and curve to the pleats next time. (See the tips from her readers)

Using quilting thread, I attached the front of each cartridge pleat to the waistband with 2-3 whip stitches. This view shows the inside of the skirt with the waist ribbon folded towards the outside for stitching. The stitches were placed to spread the pleat out along the band and give it a more rounded shape.
My references, including Victorian Costume for Ladies 1860-1900 by Linda Stenik, indicated that large pockets were made through vertical openings in the side seams. Thinking of how much I like having pockets in my own modern dresses to keep a tissue in, I decided to make an opening in the right front side seam for a pocket to stash a handkerchief in. Since the skirt placket opening is on the left front side, I thought it made sense to put the pocket on the right side.

opening for a pocket in right side seam

Kitty looked great in her corset and dress at last night’s fitting. I can’t wait to see her dress all finished.